How to Characterize and Verify the Adapters’ Performance - DSX-PCxx Patch Cord Adapters
This article describes the characterization and verification process for DSX-PC5E, DSX-PC6, and DSX-PC6A adapter sets.
This information is also available in the DSX-PCxx Patch Cord Adapters Users Manual
You will need the LinkWare PC software for this process.
When you first get the patch cord adapters, do this procedure to characterize their performance. Later, you can do the test again to see if the adapters are operating correctly.
How to Characterize the Adapters
- Attach the DSX-PCxx adapters to the main and remote DSX testers.
- Get several patch cords of the same length that are possibly good.
- On the main DSX tester, select a patch cord test limit that is applicable to the patch cords.
-
Do an Autotest on the patch cords to find one that passes. A PASS* result is sufficient. Select two good patch cords to be your reference patch cords.
- 참고: Keep patch cords straight when testing.
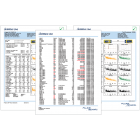
- Save the test results from the reference patch cord, then upload the results to LinkWare. Keep the results where you can find them later.
- Mark the reference patch cord ends with “main” and “remote” as it was connected for the test. Keep the reference patch cord to use later for performance tests on the adapters.
! Caution !
For consistent return loss measurements from the reference patch cord, do not put mechanical stress on the cord during tests or storage. Patch cord performance can change when you bend or twist the cord.
참고:
When you do a test on the reference patch cord later, you will use the same main and remote DSX testers you used for the initial test. The test results include the serial numbers of the testers.
How to Verify the Adapters’ Performance
Use this procedure to compare results from the initial characterization test with current results to see if the adapters are operating correctly.
- Use LinkWare to open the results from the initial test on the reference patch cord.
- Get the same main and remote DSX testers you used for the initial test. The serial numbers are in the test results.
- Attach the patch cord adapters to the testers.
- Connect the reference patch cord between the main and remote DSX testers. Make sure to connect the ends of the patch cord to the correct testers.
- On the DSX tester, select the same patch cord test limit you used for the initial test.
- Do an Autotest, then save the results.
-
Use the plots on the DSX and in LinkWare to compare the NEXT and RL margins in the areas nearest the limit line. For a good adapter and jack, the old and new NEXT and RL margins should be very similar.
- 참고: If you replaced the jacks on the adapters, the difference between the old and new margins can be more than 0.5 dB. If the difference is more than a few dB, make sure the new jacks are installed correctly and the adapters show no damage.
- If the old and new margins are not similar, replace the RJ45 jacks on the adapters. See: When to Replace the Jacks - DSX-PCxx Adapters
- If you did this procedure to verify the performance of new jacks on the adapters, keep the results as the new characterization results for the adapters.


